• 3 Mile Walks or Less
  • 4 Mile Walks
  • 5 Mile Walks
  • 6 Mile Walks
  • 7 Mile Walks
  • 8 Mile Walks
  • 9 Mile Walks
  • 10 Mile Walks
  • 11 Mile Walks
  • 12 Mile Walks
  • 14 Mile Walks
  • 15 Mile Walks
  • 20+ Mile Walks

The Wandering Wildflower

Peak District Hikes

  • PEAK DISTRICT WALKS
    • SHORT WALKS UNDER 3 MILES
    • MEDIUM WALKS 4-9 MILES
    • LONG PEAK DISTRICT WALKS 10 MILES +
  • PEAK DISTRICT WALKS WITH PUBS
  • PEAK DISTRICT WALKS WITH KIDS
  • HOLMFIRTH WALKS

Lost Lad and Back Tor with Abbey Brook | 10 Miles

July 15, 2023 CIRCULAR WALKS, LONG PEAK DISTRICT WALKS 10 MILES +, PEAK DISTRICT WALKS

This is one of my favourite Peak District walks, heading up onto the beautiful moors above Derwent Reservoir. Heading up Walkers Clough, the route passes Lost Lad and Back Tor before wandering along Cartledge Stones Ridge before wandering back down the stunning Abbey Brook, one of the hidden gems of the Peak District.

A rocky valley with steep sides, as seen from the top of one of the sides

The stunning Abbey Brook


This route is 10 miles with a steep climb to Lost Lad, and navigation is challenging in places (especially at the top of Abbey Brook) but it’s definitely worth the climb!

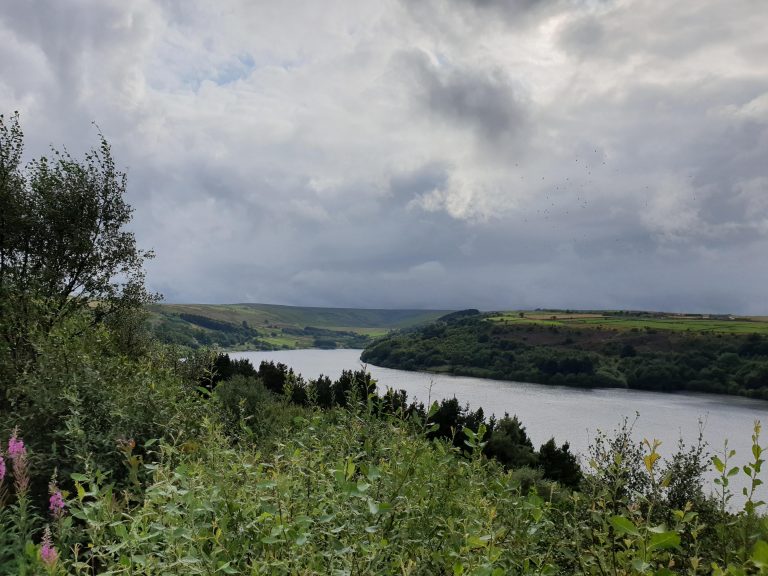
I started this walk at Fairholmes, and as it was a really rainy day there was hardly anyone else around. Fairholmes does get REALLY busy on sunny weekends over summer so this made a nice change. I set off towards the imposing Derwent Dam, built in 1916 to create the Derwent Reservoir, and followed the road round until I came to the signpost pointing to Slippery Stones, and then I followed the track north as though I was heading to the front door of the tower. There are some steps to the right which I followed up onto the track that runs around the reservoirs.

One of the towers at Derwent Dam hidden in the trees - it's very castle like


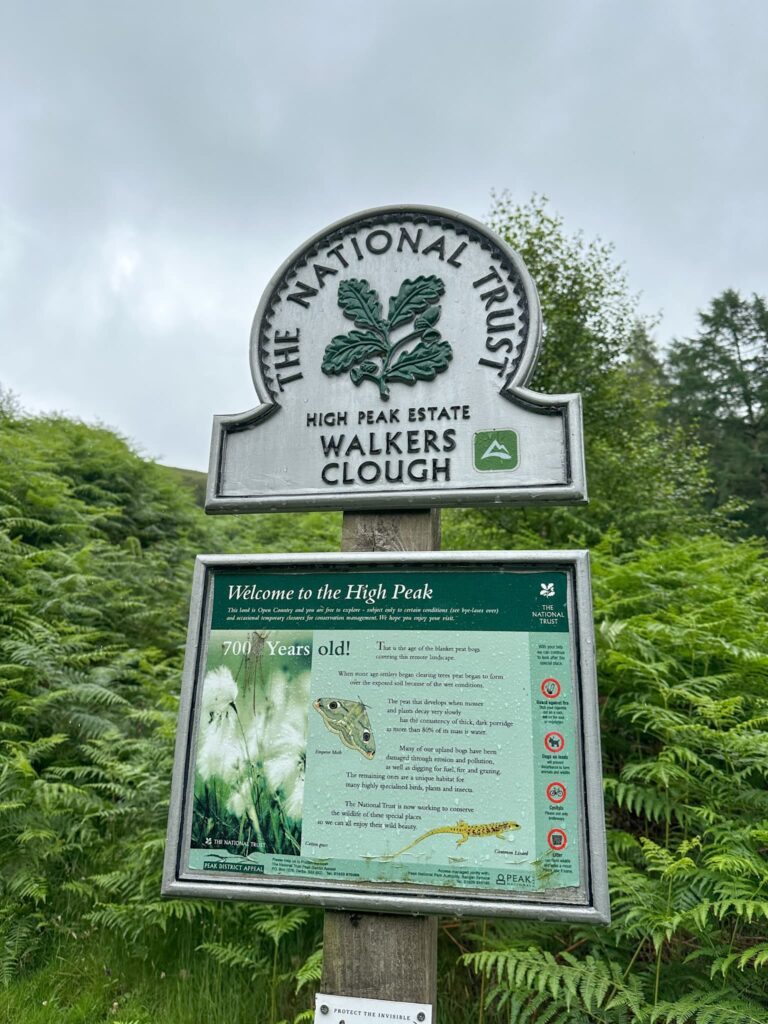
After about half a mile I came to the turning for Walkers Clough. Here I made a mistake and took the wrong fork in the path thinking it would save me some time. It didn’t! Take the right hand path and follow the track up to the gate. The route I took headed up through the woods to a gate I had to climb over, a wall I had to follow and then armpit high wet bracken which made it impossible to see the path on the ground! I had to make my way back to the wall, follow it down the steep hillside and pick up the track I SHOULD have taken the first time!


The iconic Derwent Dam

A National Trust sign for Walkers Clough

A very stony and rough path


From here it was a simple but steep climb up the hillside. I spotted the ruins of Bamford House and headed across the hillside to have a quick look at them. Bamford House was a farmhouse and outbuildings built before 1767. The views from here back over Derwent Reservoir are amazing! I walked through the complex and followed one of the paths south-east, climbing up the hillside to a cairn.


A ruined stone farmhouse known as Bamford House

The ruins of Bamford House

A view down over Derwent Reservoir

A cairn to show walkers the way on the hillside

I started along that path but it didn’t look like it ended up where I wanted (it’s different to the one shown on the OS) so I retraced my steps and followed the wall line up before turning right along the top.


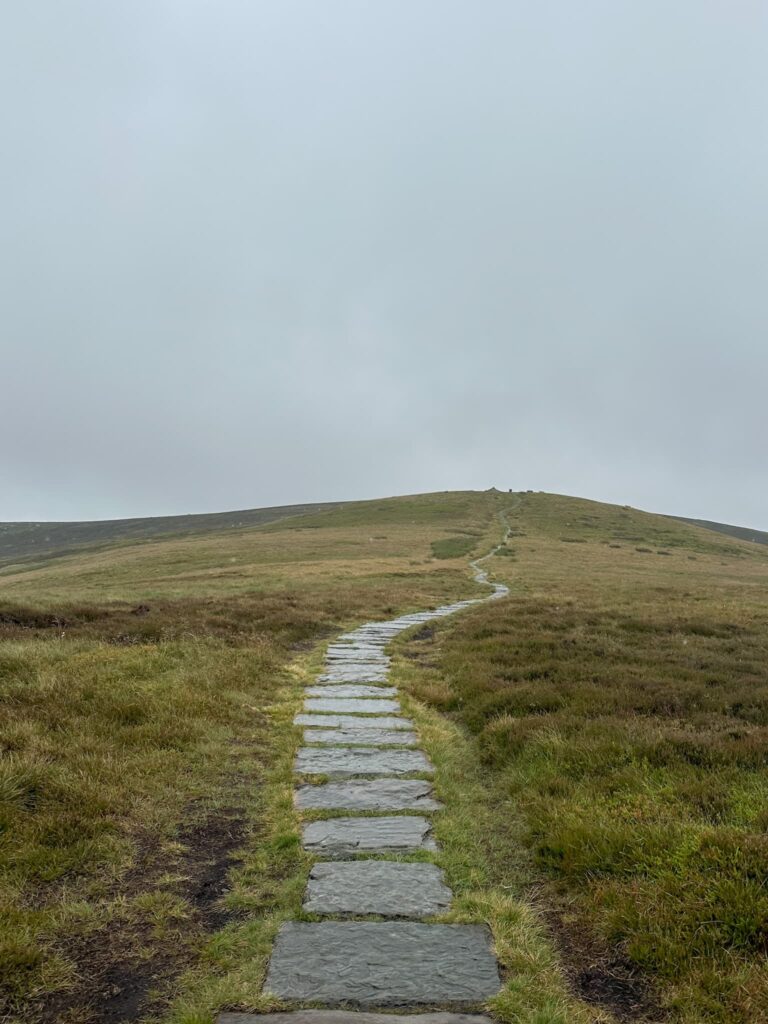
At the cairn I started on the wrong path (not paying attention!) so quickly retraced my steps to follow the path up the hill alongside the wall. At the top there are stunning views across the moors to Outer Edge and High Stones. Through the gate, the path heads north-east towards Green Sitches and then forks, so I took the left fork to climb up the stone steps to Lost Lad. Lost Lad is marked by a cairn and a toposcope, showing the nearby summits – not that I could see many! The cairn commemorates the demise of a shepherd boy from Derwent sometime in the late 17th century. He apparently went out to collect the sheep from the moor but was caught in a blizzard. He sought shelter in the lee of a rock but he knew he was doomed, so scratched Lost Lad on the rock and died. His body was discovered the following spring when the snow had all melted. The cairn was created in his memory.

A wooden fence and signpost

Stone steps in the hillside leading to Lost Lad

A stone flagged path on the moor leading to Lost Lad

A stone circular toposcope, an information plaque showing the nearby hills

The Lost Lad toposcope, with a view to Back Tor


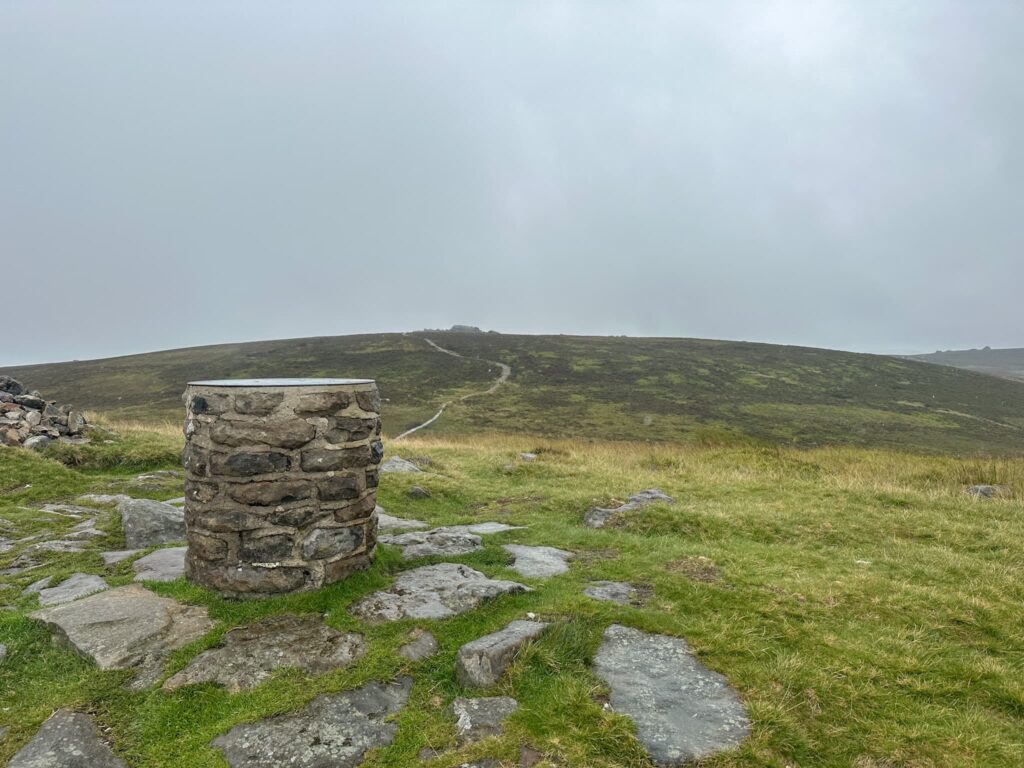
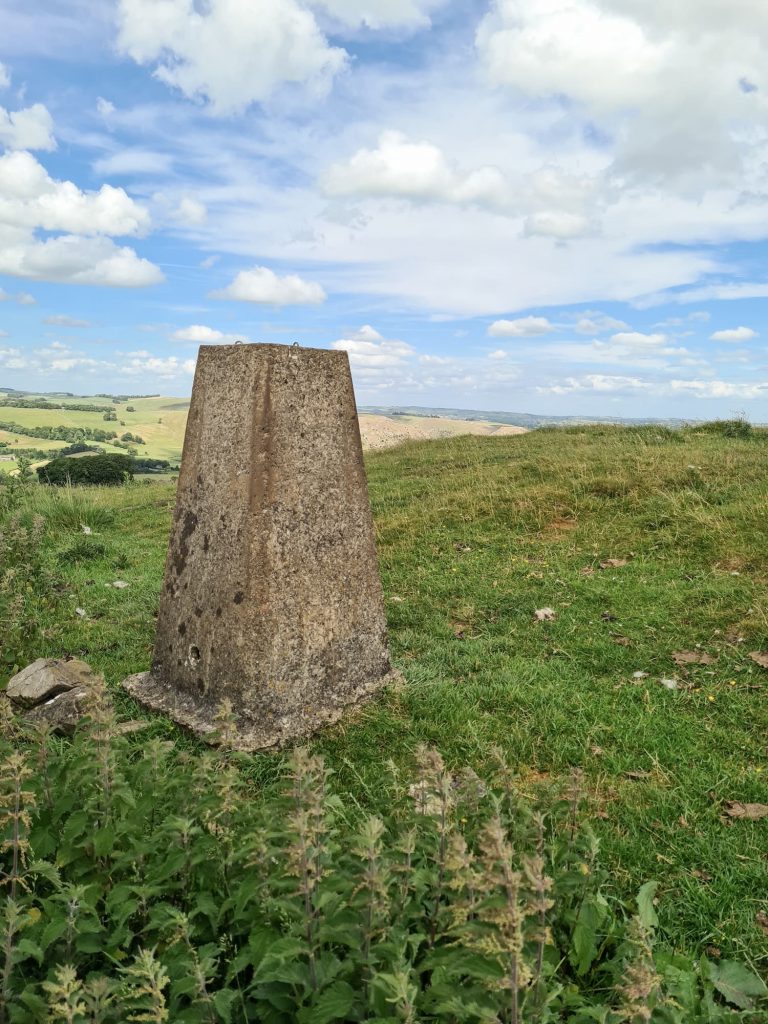
From Lost Lad it’s a short walk up the hill to reach Back Tor, an impressive gritstone outcrop with a trig point set high on the rocks. It’s a bit of a climb up the rocks, which can be slippery when it’s wet, to reach the trig point.


A very moody rainswept Back Tor, a large collection of gritstone boulders

A very moody rainswept Back Tor, a large collection of gritstone boulders

A very moody rainswept Back Tor


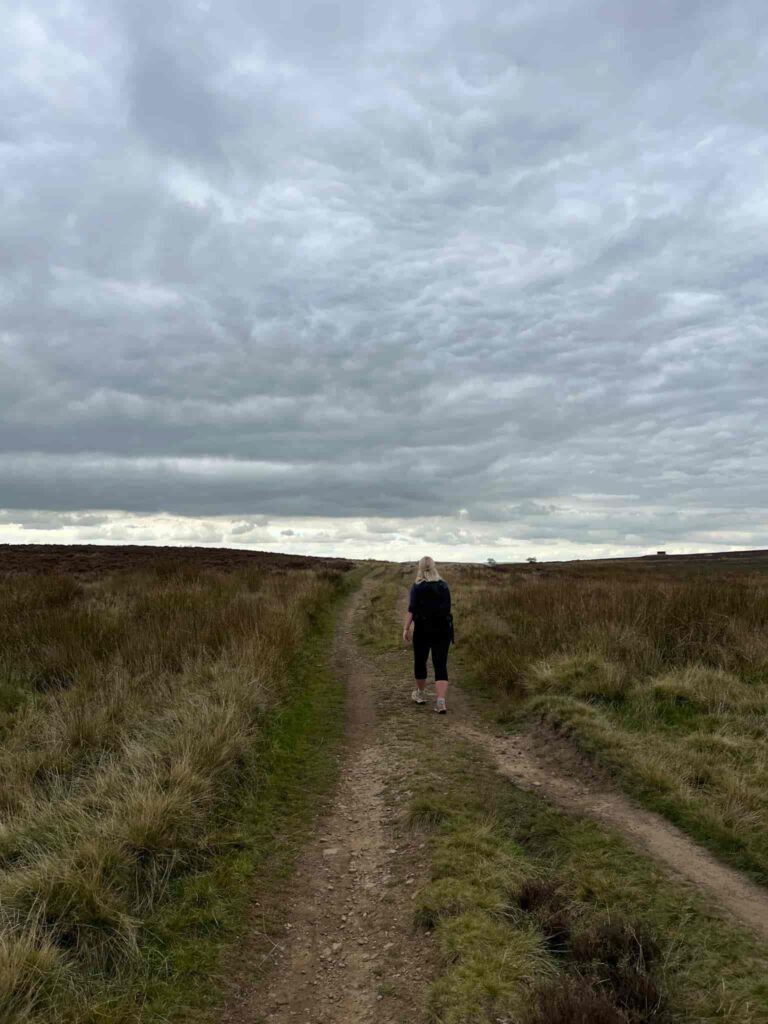
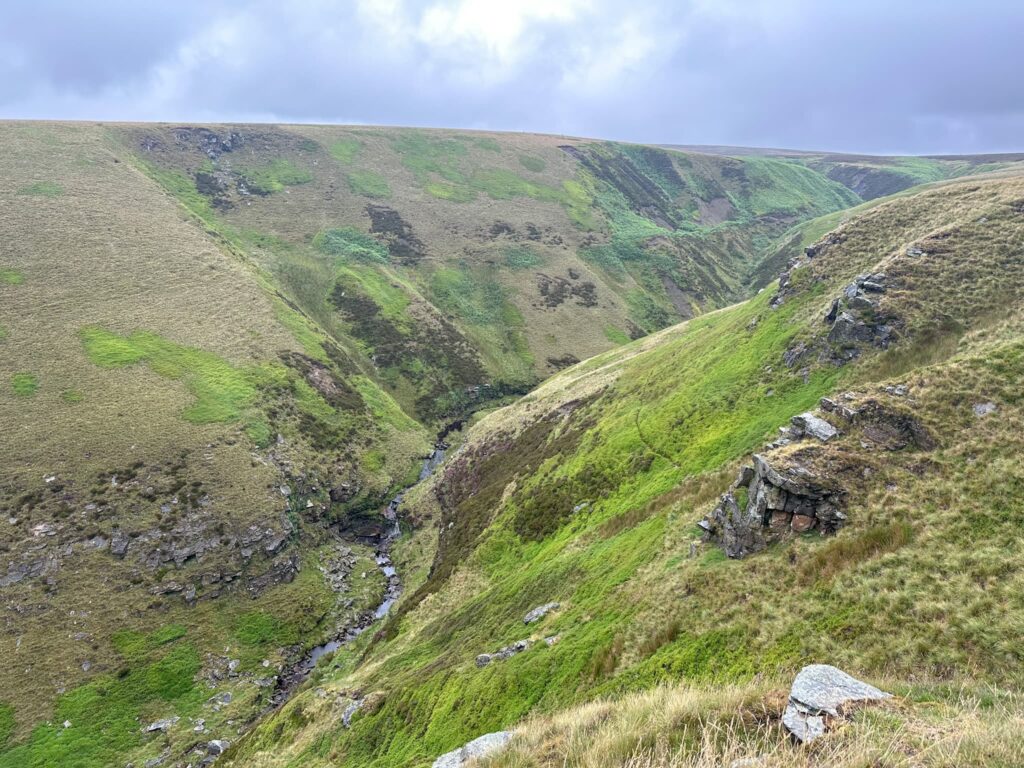
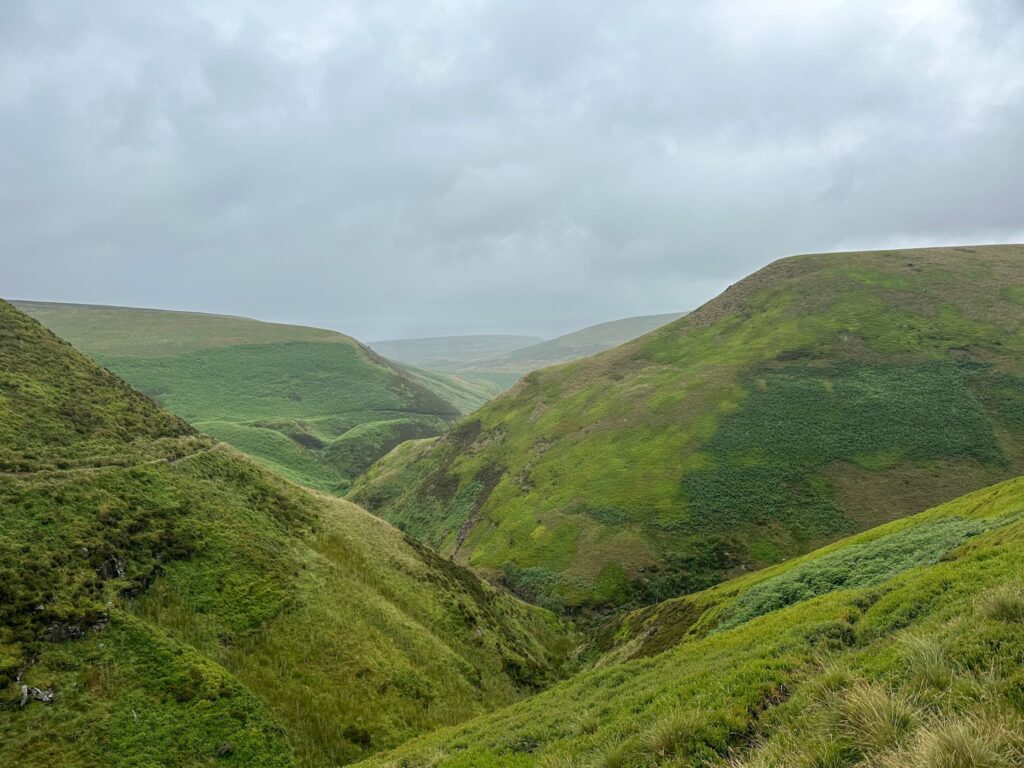
After I’d taken a few pics of the trig point I headed over to have a look at some other nearby rocks and take a few pics of the heather, then I rejoined the path that runs along Cartledge Stones Rise. This is a (mostly) paved path that runs for about 2 miles, dropping down and doglegging left after about 1.5 miles and then it reaches a stone cairn. At the cairn I headed east to Abbey Brook, following a very faint path through the heather. There is a boggy bit here which you’re best to go around rather than through! The reeds will show you where it is.


A stone cairn to show walkers the way

To the left of the cairn is a path through the heather. Beware the boggy reedy area!


As I followed the path down Abbey Brook it got easier to follow, and the views are amazing as you wander down. The path runs very close to the edge in places and there is a steep drop down to the Brook itself. There are a few waterfalls along the brook itself.


A rocky valley with steep sides, as seen from the top of one of the sides

A rocky valley with steep sides, as seen from the top of one of the sides


The path passes over Bents Clough and Cogman Clough, where there are the remains of an old barn or shepherd’s shelter just visible, then carries on down the hillside. Eventually it runs alongside a wall adjacent to woodland, and then there is a gate to pass to drop down onto the track around Derwent Reservoir again. From here you can see the remains of the old railway track at Birchenlee used in the construction of the reservoir. The path runs roughly south and heads back to Derwent Dam, and then back to Fairholmes.


A moody rainswept Derwent Reservoir

This was a really lovely walk, and is especially nice when the heather is blooming. There’s lots of history to see along the way as well. The GPX file shows the right route to follow as we planned it on the OS App, whereas the Komoot is the walk I did, with errors and all, so you can download the proper route and use that one!


Back Tor and Lost Lad Walk Map:


Walk Map (Opens in OS Maps): Lost Lad, Back Tor and Abbey Brook Walk Map

Parking: Fairholmes car park, Bamford, Hope Valley S33 0AQ W3W//: coasting.promotion.hype – £6 for the day

Facilities: There is a cafe and toilets at Fairholmes.

Walk Time: 4-5 hours

Difficulty: ▲▲▲

Distance: 10 miles (14.6km)

Elevation: 1525ft (464m)

Trig Points Bagged: Back Tor

Peak District Peaks Bagged: Back Tor, Lost Lad

Peak District Ethels Bagged: Back Tor, Lost Lad


Some other walks from Fairholmes:

Derwent Reservoir and Slippery Stones Walk

Picture Perfect: A Walk Along Ladybower Reservoir and Derwent Edge

Alport Castles and Westend Moor Trig Point

Fairholmes to the Grinah Stones


You might also like this alternative Back Tor and Lost Lad Circular Walk from The Strines Inn, Derwent Edge Walk from Cutthroat Bridge or this Derwent Edge, Derwent Moors and Boots Folly walk.

Tap to share with your hiking friends!

  • Facebook
  • Email
  • WhatsApp
« USAAF B24-H Liberator Crash Site on Twizle Head Moss, Holmfirth
Old Glossop to Bleaklow Head and Cock Hill Circular | 8 Miles »

RELATED POSTS

  • Hathersage Stepping StonesHathersage Stepping Stones Walk | 7 Miles
  • Ladybower ReservoirLadybower Walk | 6 Miles
  • Anvil Stone, GrindsbrookGrindsbrook Clough Scramble to Grindslow Knoll | 7 Miles
  • Bleaklow Stones - The Wandering WildflowerMiddle Black Clough Waterfall and Bleaklow Stones | 7 Miles

Leave a Reply Cancel reply

Your email address will not be published. Required fields are marked *

FIND YOUR NEXT WALK:

ABOUT ME

Y Garn with Kids - Y Garn via the Devil's Kitchen Walk in Ogwen Valley

Hello! I’m Jo! Welcome to The Wandering Wildflower, an outdoors lifestyle blog focusing on family walks in the Peak District, a place we love exploring. I want to share the Peak District hidden gems and show you there’s so much more than the honeypot places. When I’m not dragging my husband and now 11 year old out on Peak District walks or up mountains, I can be found on planning my next moorland walk or plotting a Geocache walk (and seeing where the nearest pub is!). I love the hills but hate the heights, so trig bagging is – er- fun!


I hope this blog will give you some ideas of places to visit in the Peak District and inspire you and your family to head into the great outdoors.  Thanks for stopping by!

CATEGORIES

  • CIRCULAR WALKS (189)
  • HOLMFIRTH WALKS (27)
  • ISLE OF SKYE WALKS (3)
  • LAKE DISTRICT WALKS (24)
  • LANCASHIRE WALKS (2)
  • LONG PEAK DISTRICT WALKS 10 MILES + (42)
  • MEDIUM WALKS 4-9 MILES (137)
  • PEAK DISTRICT SCRAMBLES (16)
  • PEAK DISTRICT WALKS (205)
  • PEAK DISTRICT WALKS WITH KIDS (76)
  • PEAK DISTRICT WALKS WITH PUBS (60)
  • SCOTLAND WALKS (6)
  • SHORT WALKS UNDER 3 MILES (40)
  • SNOWDONIA WALKS (5)
  • UK CAMPING (5)
  • YORKSHIRE WALKS (33)

Peak District Walks

List of Peak District Ethels

Peak District Peak Bagging

Peak District Trig Point Challenge

Peak District Walks with Pubs

Peak District Walks with Kids

Beautiful Walks in Holmfirth

Short Walks in the Peak District

Long Walks in the Peak District

AFFILIATE DISCLOSURE

This blog may contain affiliate links through which, at no additional cost to you, I may earn a small commission. I only recommend products I would use myself and all opinions expressed here are my own. As an Amazon Associate I earn from qualifying purchases. Read full privacy policy here.

ARCHIVES

PEAK DISTRICT WEATHER

Peak District mountain weather on Met Office

Peak District Trig Points

Promo image for a blog post about the Peak District Trig Point Challenge With Map of Peak District Trig Points and Walking Routes by The Wandering Wildflower

Peak District Ethels Challenge

Promo image for a blog post about the Peak District Trig Point Challenge With Map of Peak District Ethels and Walking Routes by The Wandering Wildflower

WALKING ROUTES STRAIGHT TO YOUR INBOX

Want new walks in your inbox? Drop your email below and I'll send you some ideas for walks you can try.

You can unsubscribe anytime. For more details, review our Privacy Policy.

Thank you!

You have successfully joined our subscriber list.

RSS LATEST POSTS

  • How to Find Three Shires Head
  • Burnbank Fell, Blake Fell and Gavel Fell | 8 Miles
  • Bretton Park Circular Walk | 3 Miles
  • Hathersage Stepping Stones Walk | 7 Miles
  • Peak District Caves

FOLLOW ON PINTEREST

Want new walks in your inbox? Drop your email below and I'll send you some ideas for walks you can try.

You can unsubscribe anytime. For more details, review our Privacy Policy.

Thank you!

You have successfully joined our subscriber list.

jo@thewanderingwildflower.co.uk

The Wandering Wildflower

  • Email
  • Facebook
  • Instagram
  • Pinterest
  • PRIVACY POLICY
  • TERMS & CONDITIONS
  • ABOUT

(c) The Wandering Wildflower. All Rights Reserved.

|| THEME BY ECLAIR DESIGNS